Sometimes, I clean and save empty glass jars. I'm not sure why. There's something inherently crafty about them. However, there's nothing crafty about them if you let them sit on a counter, collecting dust (as is usually the case in my house!).
Sometimes, inspiration strikes. I was looking for a container to hold Q-tips on my bathroom counter. Using an old jelly jar (with a name like Smuckers, it has to be good), a scrap of fabric and glue, an upcycled apothecary jar was born!
Here's how to make yours... This whole project took about 15 minutes, total.
Upcycled Glass Jelly Jar - From Trash to Treasure
Showing posts with label Home Organization. Show all posts
Wednesday, May 15, 2013
Upcycled Glass Jelly Jar - From Trash to Treasure in 15 Minutes
Monday, April 29, 2013
3 Easy Steps - Instant Personality for Your Plain Pot
The plant in my son's room came in a plain old brown, plastic pot. Could I have switched it to another pot? Yes. But, the plant looked happy in there and I didn't want to tempt fate, so I left it. But, the plainness (is that a word?!) was begging for a makeover. Here's a quick and easy way to give any pot personality in three easy steps.... The whole project took an hour, from start to finish, and looks amazing. Plus, this is a great project for kids to practice their cutting skills!
Quick & Easy - Instant Personality for your Plain Pot
Friday, March 15, 2013
Great deal on Photobooks - Get those pictures ready!
You might remember my earlier series of posts about how to transform your backed-up digital photos in actual albums (if not - relive the magic all over again by clicking below!!)
- Part 1 - Digital Photo Organization- How to Transform Your Backed-up Digital Photos into Actual Albums
- Part 2 - Ongoing Digital Photo Organization - Staying Organized and Stress-Free
Wednesday, February 27, 2013
The Final Frontier - How to Organize Refrigerator Art
I've been through many phases in my life.... collecting magnets on every vacation, papering the fridge with every photo I have, decorating it with adorable art from my little man, hanging dry-erase boards, you name it. Right now, I am craving a peaceful feeling when I look at my fridge, which is no easy thing.
When I googled and pinterested (Is that a verb? It should be), I couldn't find too many ideas, besides very expensive fridge frame magnets (like picture frames, but with powerful magnets). So, I headed to my happy place (JoAnn Fabrics) on a random shopping trip, and happened on the PERFECT thing in the clearance rack. It was like divine intervention. So, I whipped up:
Wednesday, January 16, 2013
Completely Free Subscription to Better Homes & Gardens Magazine
Here's a completely free subscription for one year to Better Homes & Gardens. You don't need to provide a credit card and you won't be billed. I've done this offer before, and it's legit! Unfortunately, a subscription does not mean that your house or garden will automatically look like those featured in the magazine, but they're purdy to look at!
Here's how to sign up....
One Woman's Fight Against Grime - Oven Edition
We have an older white gas oven, with gray grates and those other things! You know, the round pieces that go over the burners, but under the grates? I am embarrassed to say that I don't know what they're called. As you can tell from this blog, I like to cook, and within a week or two, the amount of food and grime that can attach itself to my stove top is appalling. Over the years, I've been on a quest to find an efficient way to clean the burners and the grates. I've tried putting the round pieces and the grates in the dishwasher multiple times and have also used various cleaners. None of it made a difference worth writing home about (or blogging about)! After researching, I decided to try something new....
Monday, January 14, 2013
The Best Part of Waking Up is Small Sized Toys in Your Cup!
| Before.... |
Friday, January 11, 2013
Turning Lemons into Lemonade - What I Did with TWELVE Year Old Bottled Water!!!
Last week, my son and I were cleaning out our hallway closet and we made a discovery - Two 1 gallon bottles of water. That doesn't sound bad, does it? Well, they had been purchased in 2001!! That's right, 12 years ago! We were all still listening to N'Sync, watching Moulin Rouge, and loving Jack Bauer on 24. I had purchased the bottles right after September, 2011, in an effort to be prepared. Without realizing it, they endured two moves in multiple counties and were with me when I got married and bought a house. Sniff sniff.
Well, last week I realized that it was time to let them go. But it seemed like a sin to waste that water! What to do?
| Yes, that says "EXPIRATION DATE: 2003" |
Monday, January 7, 2013
Tales from the DIY Junkyard: What You Can Learn from Scrapping Projects
Today, I'd like to introduce a new series of posts that I'll be writing from time to time.... Tales from the DIY Junkyard!
Despite my best efforts, sometimes a project just doesn't work. It's okay to admit it. In a lot of ways, the internet and parenting magazines are empowering, because they offer new and creative ideas. On the other hand, they can get you down, because everything looks so perfect and simple. "Look... an heirloom afghan in two easy steps!" But, like we tell our kids, things are not always as advertised.
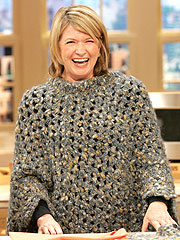
It's easy to get discouraged thinking that people are born Martha Stewarts. Even Martha has had some DIY disasters, I promise you. Who knows? Maybe she had a few bad starts to those prison ponchos she made and had to turn them into washcloths, instead.
And, it's not just DIY projects that can go bust... Some home organization ideas can actually make things messier, new recipes can be awful, and birthday cakes can be accidentally dropped on the floor (true story). Instead of locking these stories up in the shame vault, let's be loud and proud! Sometimes, you can learn more from failed projects than successful ones.
On that note, may I present to you: "Bailing on the Recipe Binder"
Despite my best efforts, sometimes a project just doesn't work. It's okay to admit it. In a lot of ways, the internet and parenting magazines are empowering, because they offer new and creative ideas. On the other hand, they can get you down, because everything looks so perfect and simple. "Look... an heirloom afghan in two easy steps!" But, like we tell our kids, things are not always as advertised.And, it's not just DIY projects that can go bust... Some home organization ideas can actually make things messier, new recipes can be awful, and birthday cakes can be accidentally dropped on the floor (true story). Instead of locking these stories up in the shame vault, let's be loud and proud! Sometimes, you can learn more from failed projects than successful ones.
On that note, may I present to you: "Bailing on the Recipe Binder"
Posted by
Unknown
Tales from the DIY Junkyard: What You Can Learn from Scrapping Projects
2013-01-07T21:59:00-05:00
Unknown
Being Crafty|Home Organization|Inspiration|Recipes|
Comments
Labels:
Being Crafty,
Home Organization,
Inspiration,
Recipes
Sunday, January 6, 2013
Part II - Your Ongoing Digital Photo Strategy; Organized and Stress Free!
Earlier in the week, we talked about how to transform all of your backed-up digital pictures into real albums! If you missed that post, check it out here....
Okay, so you're all caught up! You have beautiful photobooks, by year, that your family can enjoy anytime. Now what? How can you avoid the pile-up from happening again? Easy! And trust me, if you I can do it, you can do it, too! Not only am I the president of this club, I'm also a member ;)
Part II - Your Ongoing Digital Photo Strategy; Organized & Stress-free!
Okay, so you're all caught up! You have beautiful photobooks, by year, that your family can enjoy anytime. Now what? How can you avoid the pile-up from happening again? Easy! And trust me, if you I can do it, you can do it, too! Not only am I the president of this club, I'm also a member ;)
Part II - Your Ongoing Digital Photo Strategy; Organized & Stress-free!
Posted by
Unknown
Part II - Your Ongoing Digital Photo Strategy; Organized and Stress Free!
2013-01-06T08:12:00-05:00
Unknown
Home Organization|Things Grown-ups Love|
Comments
Labels:
Home Organization,
Things Grown-ups Love
Thursday, January 3, 2013
City of Motherly Love Block Party - Week #1
Wednesday, January 2, 2013
Help Your Digital Pictures Shine - How to Transform Your Backed-up Pictures into Real Albums
A philosophical question - if your pictures are only on your camera or computer, do they really exist?
Seriously, sometimes I miss the old days... Do you remember finishing a roll of film, and then running to get it developed? Sure, your thumb might've guest-starred in a picture or two, or you might've had some scary red eye, but it was physical photographic evidence that your vacation (or pageant or party) actually happened!
Don't get me wrong - I love my digital camera. People run when they see me coming, because I snap pictures non-stop. After my son was born, my condition took a turn for the worse. Soon, I realized there were thousands of shots on my computer and no actual albums to show for it. Something had to be done. So, little by little, I implemented the following digital picture organization strategy, and I'd like to share it with you!
Seriously, sometimes I miss the old days... Do you remember finishing a roll of film, and then running to get it developed? Sure, your thumb might've guest-starred in a picture or two, or you might've had some scary red eye, but it was physical photographic evidence that your vacation (or pageant or party) actually happened!
Don't get me wrong - I love my digital camera. People run when they see me coming, because I snap pictures non-stop. After my son was born, my condition took a turn for the worse. Soon, I realized there were thousands of shots on my computer and no actual albums to show for it. Something had to be done. So, little by little, I implemented the following digital picture organization strategy, and I'd like to share it with you!
Saturday, December 29, 2012
Easy Home Organization Craft for Kids (or Adults)
The New Year is coming, where we'll all make resolutions to get organized, get in shape, etc. Well, I can't help with getting in shape, but I can help with getting organized (in a creative way, of course!). Here's a fun craft you can do with your child, teenager, or just for yourself....
DIY Decoupage Organizer
Here's how to make this easy, but useful craft!
DIY Decoupage Organizer
Tuesday, December 18, 2012
Greeting Cards - How to Save Money and Time (and Stay Organized)
Two Scenarios -
A. You're standing in Hallmark, surrounded by too many choices. You look from option to option, starting to sweat. Which wording would be best? Finally, you choose a card. You pick it up, turn it over, and see that this simple little card costs $4.99! You put the card back and run out of the store!
B. Your child gets invited to a last minute birthday party. The night before, you realize you don't have a birthday card. You run out to the grocery store just for a card. Then, the following week, you do it all again.
Everyone loves a nice greeting card. It sends the message that someone is thinking of you fondly. But, that doesn't mean that finding the right cards should be stressful or expensive!
Are you ready for my system?! It's easy, organized and saves you time and money!
How to Make Your Own In-Home Greeting Card Store
A. You're standing in Hallmark, surrounded by too many choices. You look from option to option, starting to sweat. Which wording would be best? Finally, you choose a card. You pick it up, turn it over, and see that this simple little card costs $4.99! You put the card back and run out of the store!
B. Your child gets invited to a last minute birthday party. The night before, you realize you don't have a birthday card. You run out to the grocery store just for a card. Then, the following week, you do it all again.
Everyone loves a nice greeting card. It sends the message that someone is thinking of you fondly. But, that doesn't mean that finding the right cards should be stressful or expensive!
Are you ready for my system?! It's easy, organized and saves you time and money!
How to Make Your Own In-Home Greeting Card Store
Sunday, December 9, 2012
DIY Heirloom Cookbook - Great as a holiday gift, bridal shower gift, or anniversary gift!
Are you looking for a unique, meaningful, useful gift you can make for a family member or friend? Look no further.... Here is one of the most memorable gifts I've ever received, and I want to share it with you.
Do-it-Yourself Heirloom Cookbook
This gift can be tailored according to how much or how little time you have. I received this gift from my mom at my bridal shower, and I treasure it to this day!
Supplies:
1 recipe binder that has slip in, transparent sleeves and dividers (Hallmark has nice ones)
Plenty of recipe cards
A little bit of creativity
Instructions:
So easy....
Purchase a sturdy recipe binder:
Make sure you have plenty of blank recipe cards.....
Come up with the categories for the recipes and assign everyone a category (or, assign yourself all of the categories!).
Send out the cards (or fill them out yourself) and slip the completed recipes into the sleeves, by type.
Then, add your own personal inscription on the front.
Make sure to include plenty of extra recipe cards and recipe sleeves. Get ready for this to be the favorite gift the recipient receives!!!!!
Do-it-Yourself Heirloom Cookbook
This gift can be tailored according to how much or how little time you have. I received this gift from my mom at my bridal shower, and I treasure it to this day!
Supplies:
1 recipe binder that has slip in, transparent sleeves and dividers (Hallmark has nice ones)
Plenty of recipe cards
A little bit of creativity
Instructions:
- Come up with the recipe categories: Some examples.... Appetizers, Soups & Salads, Entrees, Side Dishes, Desserts, Snacks
- If you have a lot of time: Solicit family members, friends, and co-workers for their favorite recipes. The more tried and true the better. Provide everyone with a blank recipe card. If this is for a shower or anniversary party gift, include a blank recipe card with each invitation. My mom even sent the recipe cards to special people from my past, like teachers and neighbors. Everyone jumped at the chance to participate!
- Hint: To make sure there is a wide variety of recipe types, assign everyone a different category. For example, some people are asked to provide an appetizer recipe, some are asked for a dessert recipe, etc. Otherwise, you'll get a lot of cookie recipes (not that there's anything wrong with that).
- If you don't have much time: Fill in the recipe cards yourself with your favorite recipes. Call family members and ask them to e-mail you with their favorite recipes, and complete the cards on their behalf. Make sure to say who the recipe is from!
- Include a personal inscription: Inside the front cover, include your own "recipe for a happy life together" or whatever is appropriate for the occasion. My mom wrote the most beautiful, creative "dedication"... Here's a starter, "Take a wonderful couple, mix, and let simmer for 5 years"... It's so cute and personal.
- Organize by Recipe Category: Put all of the completed recipe cards in the sleeves, and organize by category.
- Include extra recipe cards and sleeves: This is a great way for the lucky recipient to grow their collection as the years go on!
- Hint: Make sure to save the box that the recipe binder came in, so the recipe binder is even easier to keep in heirloom condition!
So easy....
Purchase a sturdy recipe binder:
Make sure you have plenty of blank recipe cards.....
Come up with the categories for the recipes and assign everyone a category (or, assign yourself all of the categories!).
Send out the cards (or fill them out yourself) and slip the completed recipes into the sleeves, by type.
Then, add your own personal inscription on the front.
Make sure to include plenty of extra recipe cards and recipe sleeves. Get ready for this to be the favorite gift the recipient receives!!!!!
Friday, November 30, 2012
Preserve Your Family's History.... Here's How!
Problem: We all have tons of old VHS tapes, filled with family memories, but gathering dust (and taking up room!)
Solution: Purchase a DVD Converter, and ensure that your videos stay up to date!
When you have tapes professionally converted to DVD, it is VERY expensive. But, when you purchase the DVD Converter yourself, you can save a lot of money.
Over the summer, I converted all of our VHS tapes to DVD (including the ones where I had a perm and sky-high bangs!).
Benefits:
* Relatively simple to do.
* Finished DVDs can be played on your computer.
* Files can be copied onto your hard drive.
* Your kids will have a BLAST seeing all of the old videos.
* Cheaper (and more private) than having a professional do it for you.
* It is beyond satisfying to throw out the old, clunky VHS tapes and make way for the space efficient DVDs!!!!
Drawbacks:
* DVD Makers are not cheap
* It can be time-consuming
There are a lot of DVD Makers on the market, but we used the one below!
Savings Tip: Keep the DVD Maker in your cart for a while on Amazon and see if it goes down in price, since they often put it on "sale."
Happy movie making!
DVD Maker
FYI - You may also need to purchase a separate AV cable to get the job done!
Solution: Purchase a DVD Converter, and ensure that your videos stay up to date!
When you have tapes professionally converted to DVD, it is VERY expensive. But, when you purchase the DVD Converter yourself, you can save a lot of money.
Over the summer, I converted all of our VHS tapes to DVD (including the ones where I had a perm and sky-high bangs!).
Benefits:
* Relatively simple to do.
* Finished DVDs can be played on your computer.
* Files can be copied onto your hard drive.
* Your kids will have a BLAST seeing all of the old videos.
* Cheaper (and more private) than having a professional do it for you.
* It is beyond satisfying to throw out the old, clunky VHS tapes and make way for the space efficient DVDs!!!!
Drawbacks:
* DVD Makers are not cheap
* It can be time-consuming
There are a lot of DVD Makers on the market, but we used the one below!
Savings Tip: Keep the DVD Maker in your cart for a while on Amazon and see if it goes down in price, since they often put it on "sale."
Happy movie making!
DVD Maker
FYI - You may also need to purchase a separate AV cable to get the job done!
Thursday, November 29, 2012
Design on a Dime - Get the Most Out of Old Furniture, Part II
The Problem: Under-utilized bottom half of kids' closet due to the those short, cute little clothes.
The Solution: Use an old (or inexpensive new) bookshelf to create instant storage.
My son has tons of books (a great problem to have) and a nice-sized closet. So, we went to Big Lots (one of my favorite stores) and got an inexpensive bookshelf for $20 to put underneath his clothes. We use it for books, but you could use it for toys, shoes, etc. We also have a nice, cozy chair right next to the closet, so the books are within easy reach!
If you like what you see on this site, make sure to Subscribe to City of Motherly Love by Email. You'll get great updates once a day!
The Solution: Use an old (or inexpensive new) bookshelf to create instant storage.
My son has tons of books (a great problem to have) and a nice-sized closet. So, we went to Big Lots (one of my favorite stores) and got an inexpensive bookshelf for $20 to put underneath his clothes. We use it for books, but you could use it for toys, shoes, etc. We also have a nice, cozy chair right next to the closet, so the books are within easy reach!
If you like what you see on this site, make sure to Subscribe to City of Motherly Love by Email. You'll get great updates once a day!
Design on a Dime - How to Get the Most Out of Old Furniture, Part I
I loooooooove finding uses for old furniture, or furniture that is not as quality as it could be (a.k.a., junky furniture).
The Problem: Old furniture, plus an unorganized, poorly utilized closet.
The Solution: Use an old chest of drawers in your closet.
Many times, the lower halves of closets aren't utilized to their potential. While my dream is to turn this space into one of those HGTV closets with tons of shelves and racks and built-ins, I'll settle for a few extra drawers for now! Realizing that my old, beat-up IKEA dresser wasn't the attractive thing in the world, I used some decals purchased from JoAnn Fabrics for $1 and dressed it up a little. You could also paint it, stencil it, etc. If room permits, you could put a little mirror on it and turn it into a little vanity. A few old scarves hung from the shelf help make the closet look a little more fun. Oh, and don't pay attention to the ironing board next to the dresser. I NEVER use it and am the worst ironer in the world!
If you like what you see on this site, make sure to Subscribe to City of Motherly Love by Email. You'll get great updates once a day!
The Problem: Old furniture, plus an unorganized, poorly utilized closet.
The Solution: Use an old chest of drawers in your closet.
Many times, the lower halves of closets aren't utilized to their potential. While my dream is to turn this space into one of those HGTV closets with tons of shelves and racks and built-ins, I'll settle for a few extra drawers for now! Realizing that my old, beat-up IKEA dresser wasn't the attractive thing in the world, I used some decals purchased from JoAnn Fabrics for $1 and dressed it up a little. You could also paint it, stencil it, etc. If room permits, you could put a little mirror on it and turn it into a little vanity. A few old scarves hung from the shelf help make the closet look a little more fun. Oh, and don't pay attention to the ironing board next to the dresser. I NEVER use it and am the worst ironer in the world!
If you like what you see on this site, make sure to Subscribe to City of Motherly Love by Email. You'll get great updates once a day!
Posted by
Unknown
Design on a Dime - How to Get the Most Out of Old Furniture, Part I
2012-11-29T13:09:00-05:00
Unknown
Home Organization|Things Grown-ups Love|
Comments
Labels:
Home Organization,
Things Grown-ups Love
Sunday, November 25, 2012
Design on a Dime - How to Change the Changing Table
If your house is like ours, the toys are slowly taking over. It's a great problem to have, but it's easy for kids to suffer from the "out of sight, out of mind" problem and only play with the toys that they can readily see. But, efficient storage can be expensive. So, try this idea on for size. One of our favorite toy organizers is this lovely set of light blue shelves. Can you guess what this used to be?

That's right, it used to be our son's changing table! It was sitting unused in our basement, and came to the rescue when we needed more storage. It used to be a light colored wood, which didn't go in our family room, but that's easy to fix.
Change the Changing Table Project Supplies:
If you don't have house paint that you like, go to your local Home Depot or Ace. They have a section with "OOPs paint" in their paint department where they sell cans of paint for $2 - $10. Often times, these are beautiful colors that customers didn't want for some reason after the store custom-mixed them. We got this gorgeous pale blue shade for $2 at Ace.
Set up the drop cloth, and make sure the paint can't bleed through it. If you think it can, put a layer of cardboard or newspapers underneath. Make sure you stir the paint well, and get to work. It you hate to sand like I do, it will take several coats to cover the shiny varnish.
Here's a trick so you don't have to wash out the brushes between each coat.... Wrap the brushes in layers of wet paper towels when not in use. The brushes won't dry out, and you won't need to keep washing them!
This is a quick and easy project that yields great results! Just make sure to the let the paint dry thoroughly before you load it up with toys!
That's right, it used to be our son's changing table! It was sitting unused in our basement, and came to the rescue when we needed more storage. It used to be a light colored wood, which didn't go in our family room, but that's easy to fix.
Change the Changing Table Project Supplies:
- Changing table
- Small can of house paint (latex wall paint is perfect)
- Drop cloth
- Paint brushes
If you don't have house paint that you like, go to your local Home Depot or Ace. They have a section with "OOPs paint" in their paint department where they sell cans of paint for $2 - $10. Often times, these are beautiful colors that customers didn't want for some reason after the store custom-mixed them. We got this gorgeous pale blue shade for $2 at Ace.
Set up the drop cloth, and make sure the paint can't bleed through it. If you think it can, put a layer of cardboard or newspapers underneath. Make sure you stir the paint well, and get to work. It you hate to sand like I do, it will take several coats to cover the shiny varnish.
Here's a trick so you don't have to wash out the brushes between each coat.... Wrap the brushes in layers of wet paper towels when not in use. The brushes won't dry out, and you won't need to keep washing them!
This is a quick and easy project that yields great results! Just make sure to the let the paint dry thoroughly before you load it up with toys!
Tuesday, November 20, 2012
Make Cheap & Easy Wall Art - Part III
And here's my last idea of the day for making cheap and easy wall art. With this project, you can make a wall hanging for adults or children. I purchased a cute white, horizontal collage frame at Jo-Ann Fabric (most of my stories begin there), but wasn't sure about what to put in it. Not long after, I was in Trader Joe's (aka, heaven on earth), perusing their greeting cards. They have beautiful, artsy cards for $1.00 each. Several of them had a Hawaiian, beachy feel, so I picked out my five favorites and put them in the collage frame.
Here's the end result....
The "Tropical Retreat" sign underneath was an impulse purchase at a local Hallmark. At first I loved it, but I've been looking at it lately with a very critical eye. I think that our time together may be drawing to a close. We'll see!!!
Anyway, you could do this project with any kind of collage frame and any kind of "art", i.e. postcards, greeting cards, advertisements, etc. Let me know what you come up with!
Here's the end result....
The "Tropical Retreat" sign underneath was an impulse purchase at a local Hallmark. At first I loved it, but I've been looking at it lately with a very critical eye. I think that our time together may be drawing to a close. We'll see!!!
Anyway, you could do this project with any kind of collage frame and any kind of "art", i.e. postcards, greeting cards, advertisements, etc. Let me know what you come up with!
Posted by
Unknown
Make Cheap & Easy Wall Art - Part III
2012-11-20T20:12:00-05:00
Unknown
Being Crafty|Home Organization|
Comments
Labels:
Being Crafty,
Home Organization
Subscribe to:
Posts (Atom)


.jpg)
.jpg)
.jpg)